 |
SX-99 Restoration
Takafumi Ueno Japanese Translation |
 |
SX-99 Restoration
Takafumi Ueno Japanese Translation |
To own an SX-99 has been my long-cherished dream. I always found the front panel design very attractive. When I was a boy, I used a picture of the SX-99 to make a home-brew shortwave radio. A long time passed. Recently, however, I decided to try my hand at restoring shortwave radios. I bought an SX-99! Here I describe my restoration and a book.
Restoration
When this SX-99 radio arrived at my home, it worked, but I found some problems.
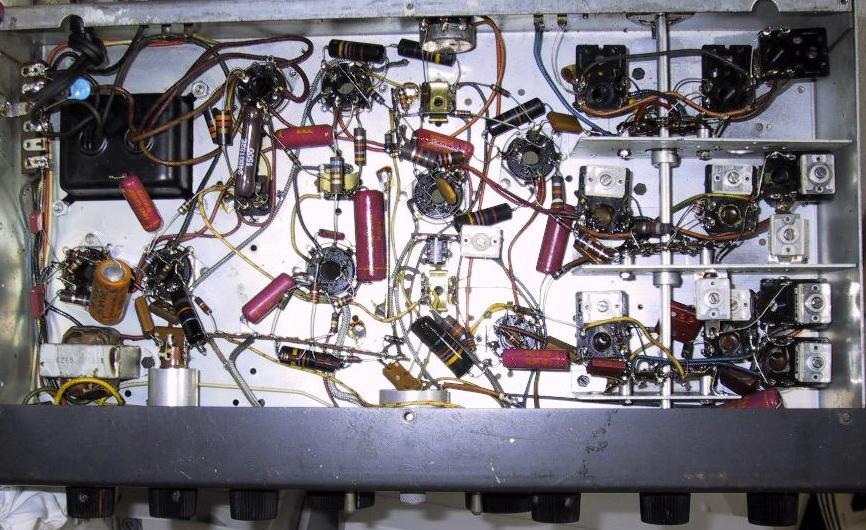
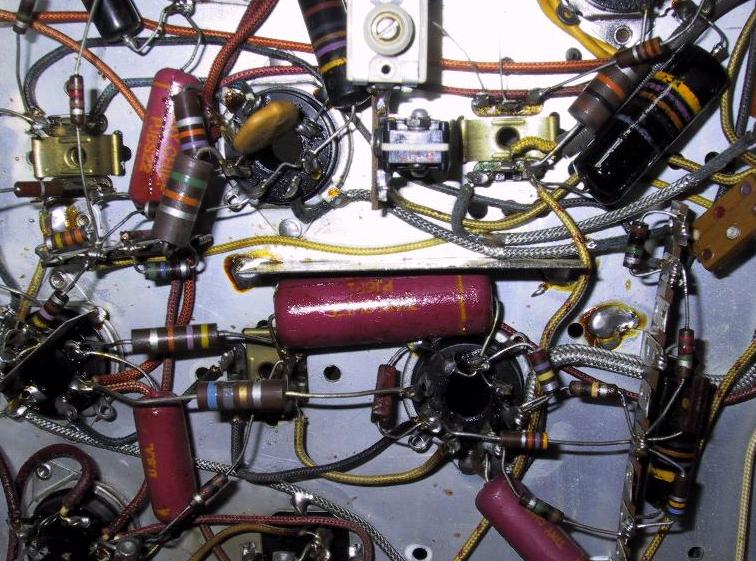
1) I cleaned the chassis very carefully, and checked the bottom of the chassis, especially the capacitors. The wax paper capacitors and molded paper capacitors seem like new. But when the power was turned on, it was apparent that they had problems. The paper capacitors were a little warm and the surface of many were a little bit melted. Also they smelled like WAX when the radio was on. Furthermore, some of the black beauties had hairline cracks. For safety, I re-capped all the wax paper capacitors and molded paper capacitors.
2) The cabinet was corroded with rust. I wanted to make my attractive SX-99 even more beautiful. So, I removed the original finish and re-painted.
Re-capping
I started to re-cap SX-99. In the following photo, almost all capacitors are original wax paper capacitors and Black Beauties.
The next photo shows some melting wax paper capacitors
 .
.
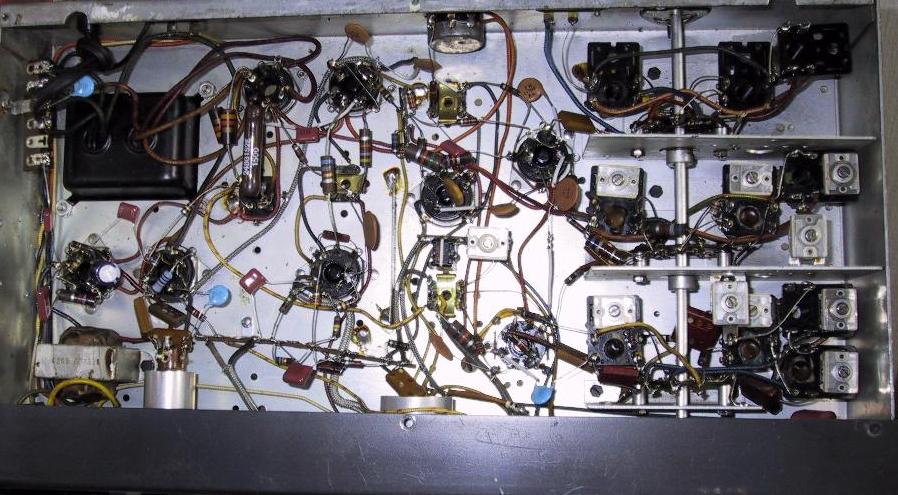
I replaced wax paper capacitors/Black beauties with ceramic/polypropylene/polyester capacitors. The next photo is view of the bottom of chassis after re-capping. I also replaced some original electrolytic capacitors and resistors with new ones.
Re-paint SX-99 cabinet
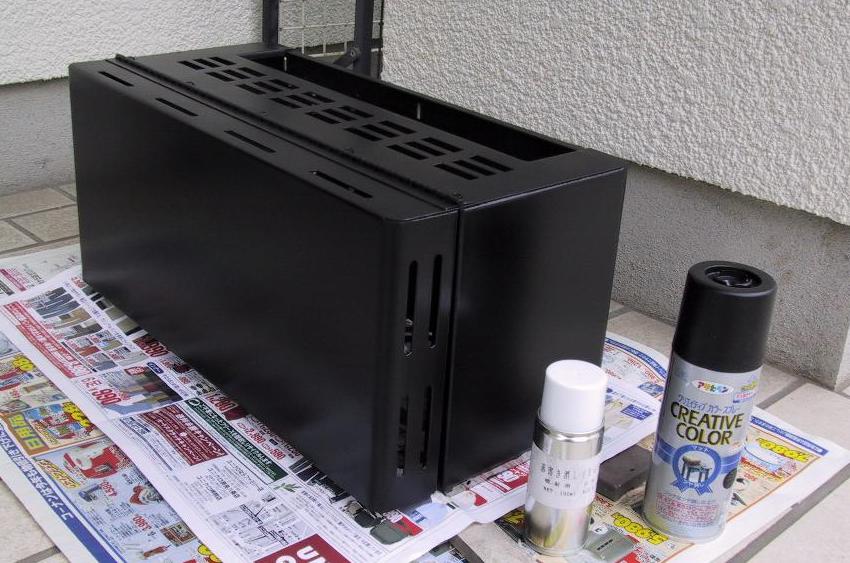
To re-paint SX-99 cabinet, the first thing I had to do is to remove the original finish, because corrosion and rust prevent smooth re-paint. For this purpose, I used EGR-E of GEO ENVIRO. This is excellent. Then I re-painted SX-99 with a mat black spray. The following photo shows the cabinet of SX-99, EGR-E and a mat black spray.
Re-alignment and test
This radio is designed for 105-125V. But in Japan, the power voltage is 100V. At my home, the AC power voltage is 100-104V. At 104V, the radio manage to receive stations. At 100V, almost nothing. Another problem is that at 100-104V, S-meter couldn't be adjusted to 0. So, I use a transformer to raise from 100V (Japanese standard voltage) to 120V
At 120V, there is no problem, the sensitivity is high enough and S-meter works well. I checked the frequency accuracy, and found that bands 1-3 are acceptable. At high frequency of band 4, there was an error. So, I did re-alignment. Finally, after re-alignment, I compared the performance of SX-99 with VR-5000 (Standard, Yaesu). The sensitivity of SX-99 is high enough, almost the same as VR-5000. The S/N of this SX-99 is very good. It is quiet. The stability is not as good as VR-5000, but it is acceptable. I'm very much surprised with the test results that the radio of 1955-1958 works as well as the modern receiver. The modern receiver is ease of use especially for tuning, but the combination of the main and sub dials of SX-99 is very smooth.
A book on SX-99.
In the next photo, the book on the right is "Communication Receiver for Amateur" published by Japan Broadcasting Publishing Co., Ltd. in 1962. The cover page is SX-99. The "half moon" style face of SX-99 is very cute. When I was a boy, I used to refer to SX-99 pictures for my hand-made receivers.
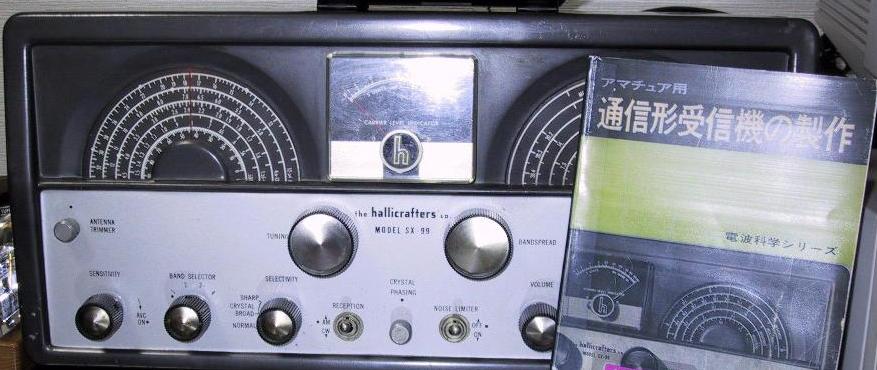
I'm very much satisfied with this SX-99, and I enjoy it.
If you have some questions, comments, Please send an e-mail to uenot@kcn.ne.jp
This page last updated 28 Apr 2002.